The most iconic thing about a unicorn is her horn. I had a pretty good idea for what I wanted.
What I didn't want:
I didn't want a chunky, fat horn that sits on the very top of my head. I did not want the "headband" party style horn that is all too common for a kid's birthday.
Horn length is a consideration too since I will have a dance partner and don't want to cause injury.
My vision was to have a short horn coming out at an angle from my hairline.
Elements I did want:
In addition to a horn, I wanted this to be a crown with veil since I have short hair and wanted to give the impression of a mane. Flowers also made sense.
The crown also needs to be secure on my head since I am dancing.
Supplies
I ended up going the wire crown route instead of a headband. Simply because it's what I had on hand.
- 18 gauge Wire
- Floral tape
- Silk flowers
- Hot Glue
- Stiff felt
- Plastic hair comb
- Glittery craft foam
- Resin Unicorn Horn (pre-made bought it on Etsy years ago)
- White Chiffon (Tulle is also an alternative)
Organza<--- Ended up not working out.- Paper, Pen, measuring tape
What I did:
Here's what I did to construct the crown.
Prep work
- Measured around my head with the jewelry wire. Once I got it around my head, I cut the extra and twisted the wire to secure the shape.
- I wrapped the twisted wire parts with floral tape. In hindsight, it would be pretty to wrap the whole crown in floral tape.
- With the crown on, measured from ear to ear across my forehead and roughly how much space I'd need for the horn and decorations.
- Sketched a box from the measurements and made a shape that fit inside the box. Marked the center where the horn would go. Cut out my pattern piece.
- Measured from my hairline down my back to where I wanted the veil to stop. Wrote down the measurement. (18") Did the same going forward in front of my face for the blusher veil. (12")
The Horn/Decor Base
This is the part of the costume that supports the horn and holds my flowers.
- I traced my paper pattern piece onto the stiff felt (for the backing) and the craft foam.
- Cut out the pattern pieces and cut a small hole in the craft foam for the horn.
- Cut a strip of stiff felt to cover about 1/2" thick.
- Inserted the horn through the hole in the foam and glued the filigree down.
- Marked where the wire would sit.
- Slowly, sandwiched the wire between the foam and the strip of felt and hot glued it down.
- Added my silk flowers to the base with hot glue.
Adding a Veil
I learned a lot from DIY bridal things. Here I'm going to outline the ideal method instead of what I actually ended up doing. I'll explain my trial and errors later.
- Add the measurement for the blusher and veil together. For me would be 30".
- Cut a rectangle with rounded corners from the chiffon/tulle fabric.
- Fold the top so it is the length of the blusher.
- Hand stitch with a long running stitch to hold in place.
- Bunch up or "gather" the fabric until it's the length of the headband front.
- Either stitch to the stiff felt backing or sandwich between the felt backing and the foam front and hot glue that mess in place.
Adding Security
To give myself some peace of mind, I broke a plastic comb and hot glued it to the felt back. The teeth of the comb pointed down towards my nose and the curve of the teeth matched my forehead.
I placed it along the top edge with hot glue. This is so the comb catches in my hair to hold things in place.
My Trial and Error
Originally, the veil was going to be chiffon with an organza blusher.
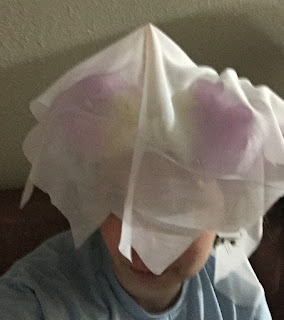
However, although the holographic effect was very cool, there's a big difference with the drape of the two fabrics. The organza was a bit stiffer so when I put on the crown, it would create a defined fold that made my head look boxy. The chiffon however, lay on my head nicely.
I tried futzing with the organza to see if I could make it work but in the end, I added another bit of chiffon fabric to make the blusher. There is a tiny bit of the blockiness but if I shift things right it looks fine.
Also unfortunately because I hot glued the organza I couldn't remove it all so there is a "trim" along the top of my crown but it looks kind of neat because of the holographic quality.


Comments
Post a Comment