This post is highlighting my (somewhat flawed) research methods and decision process for a particular costume part: Hoof Boots. (Like the ones pictured below.)
I am trying to decide whether or not to purchase the boots from an artist or to make them myself. There are several options to weigh, one of them being whether it's worth investing in a new skill.
Methods
Pros and Cons
Etsy
Pros: No mess in my apartment, high quality from an experienced creator, safety tested
Cons: Limited design choices and colors, shoe sizes too big, have to wait for shipping
Tutorial
Pros: Definitive proof that the method works, final design look is in my control
Cons: I have no experience making these things, very difficult to find used/cheap shoes in my size, Big mess, hazardous chemical materials, Not necessarily cheaper
My version
Pros: Potentially most economical method, design in my control, shoe guaranteed to fit, ankle support, learn a new skill in mold making and casting
Cons: No experience making things, untested method, unknown if safe to wear, big mess, chemical hazards, Cost of learning
Material and Budget Comparison
Based on the Tutorials, here is a list of materials I would need and an estimate of how much they would cost. Note, in this estimation, I do not count the supplies I currently have in the cost, but I will mention what I need.
Tutorial Book Supplies
Total: $~130
If I had no material:
- Mold + Resin - $74
- Fur Square - $8
- Nylons - $15
- Interfacing - $8
- High heel Shoe - $25 - $30
- Insert Sole - $10 -$15
- Epoxy Glue - $8
- EVA Foam - 4mm - $10
- PLA Filament - $20
- Paint - $3 - $10
Total: ~ $200
My Version
- Shoe Pattern - $5
- 1/2 Yard knit Fabric -$5
- 1/2 Yard lining - $5
- Velcro
- Insoles - $11
- 3D printed Heel Sole/worbla sole
- 3D printed hoof buck
- Mold and Casting kit - $74
- Epoxy Glue/Screws/Nails
- Lycra
- Stretch Velvet - $10
- Faux Fur Ribbon - $4
Total: ~$105
Evaluation Questions
So first for me, the question of cost is primary. This will be an expensive project whichever way I choose to go. I will either be investing in a new skill or paying someone for a quality item. The appeal of making it myself really gives me a sense of agency and control over the look and feel of the boots.
This is my first large silicone mold project. I've done small molds for jewelry-sized things which is still a good experience. And silicone mold mix is pretty expensive and does not have a super long shelf-life. But there is a benefit to learning this skill.
The real push for the boots is finding more than one costume I can use them for. Because to me, the cost is worth it if the item is reusable. I have 3 costume ideas for these boots already.
Other things to evaluate are safety, both for environment and how I wear these. I need to make sure my cat stays out of the mix and that the mix doesn't leak everywhere...again. Same with the resin. Resin is toxic so gotta take proper precautions. I also should be careful sewing shoes. I put a sewing needle through my thumb last time...and I don't know where my hemostats went.
Saftey in wearing means making sure things are secure, non-skid, and even. I'll also need arch support for comfort.
What I've Made so Far
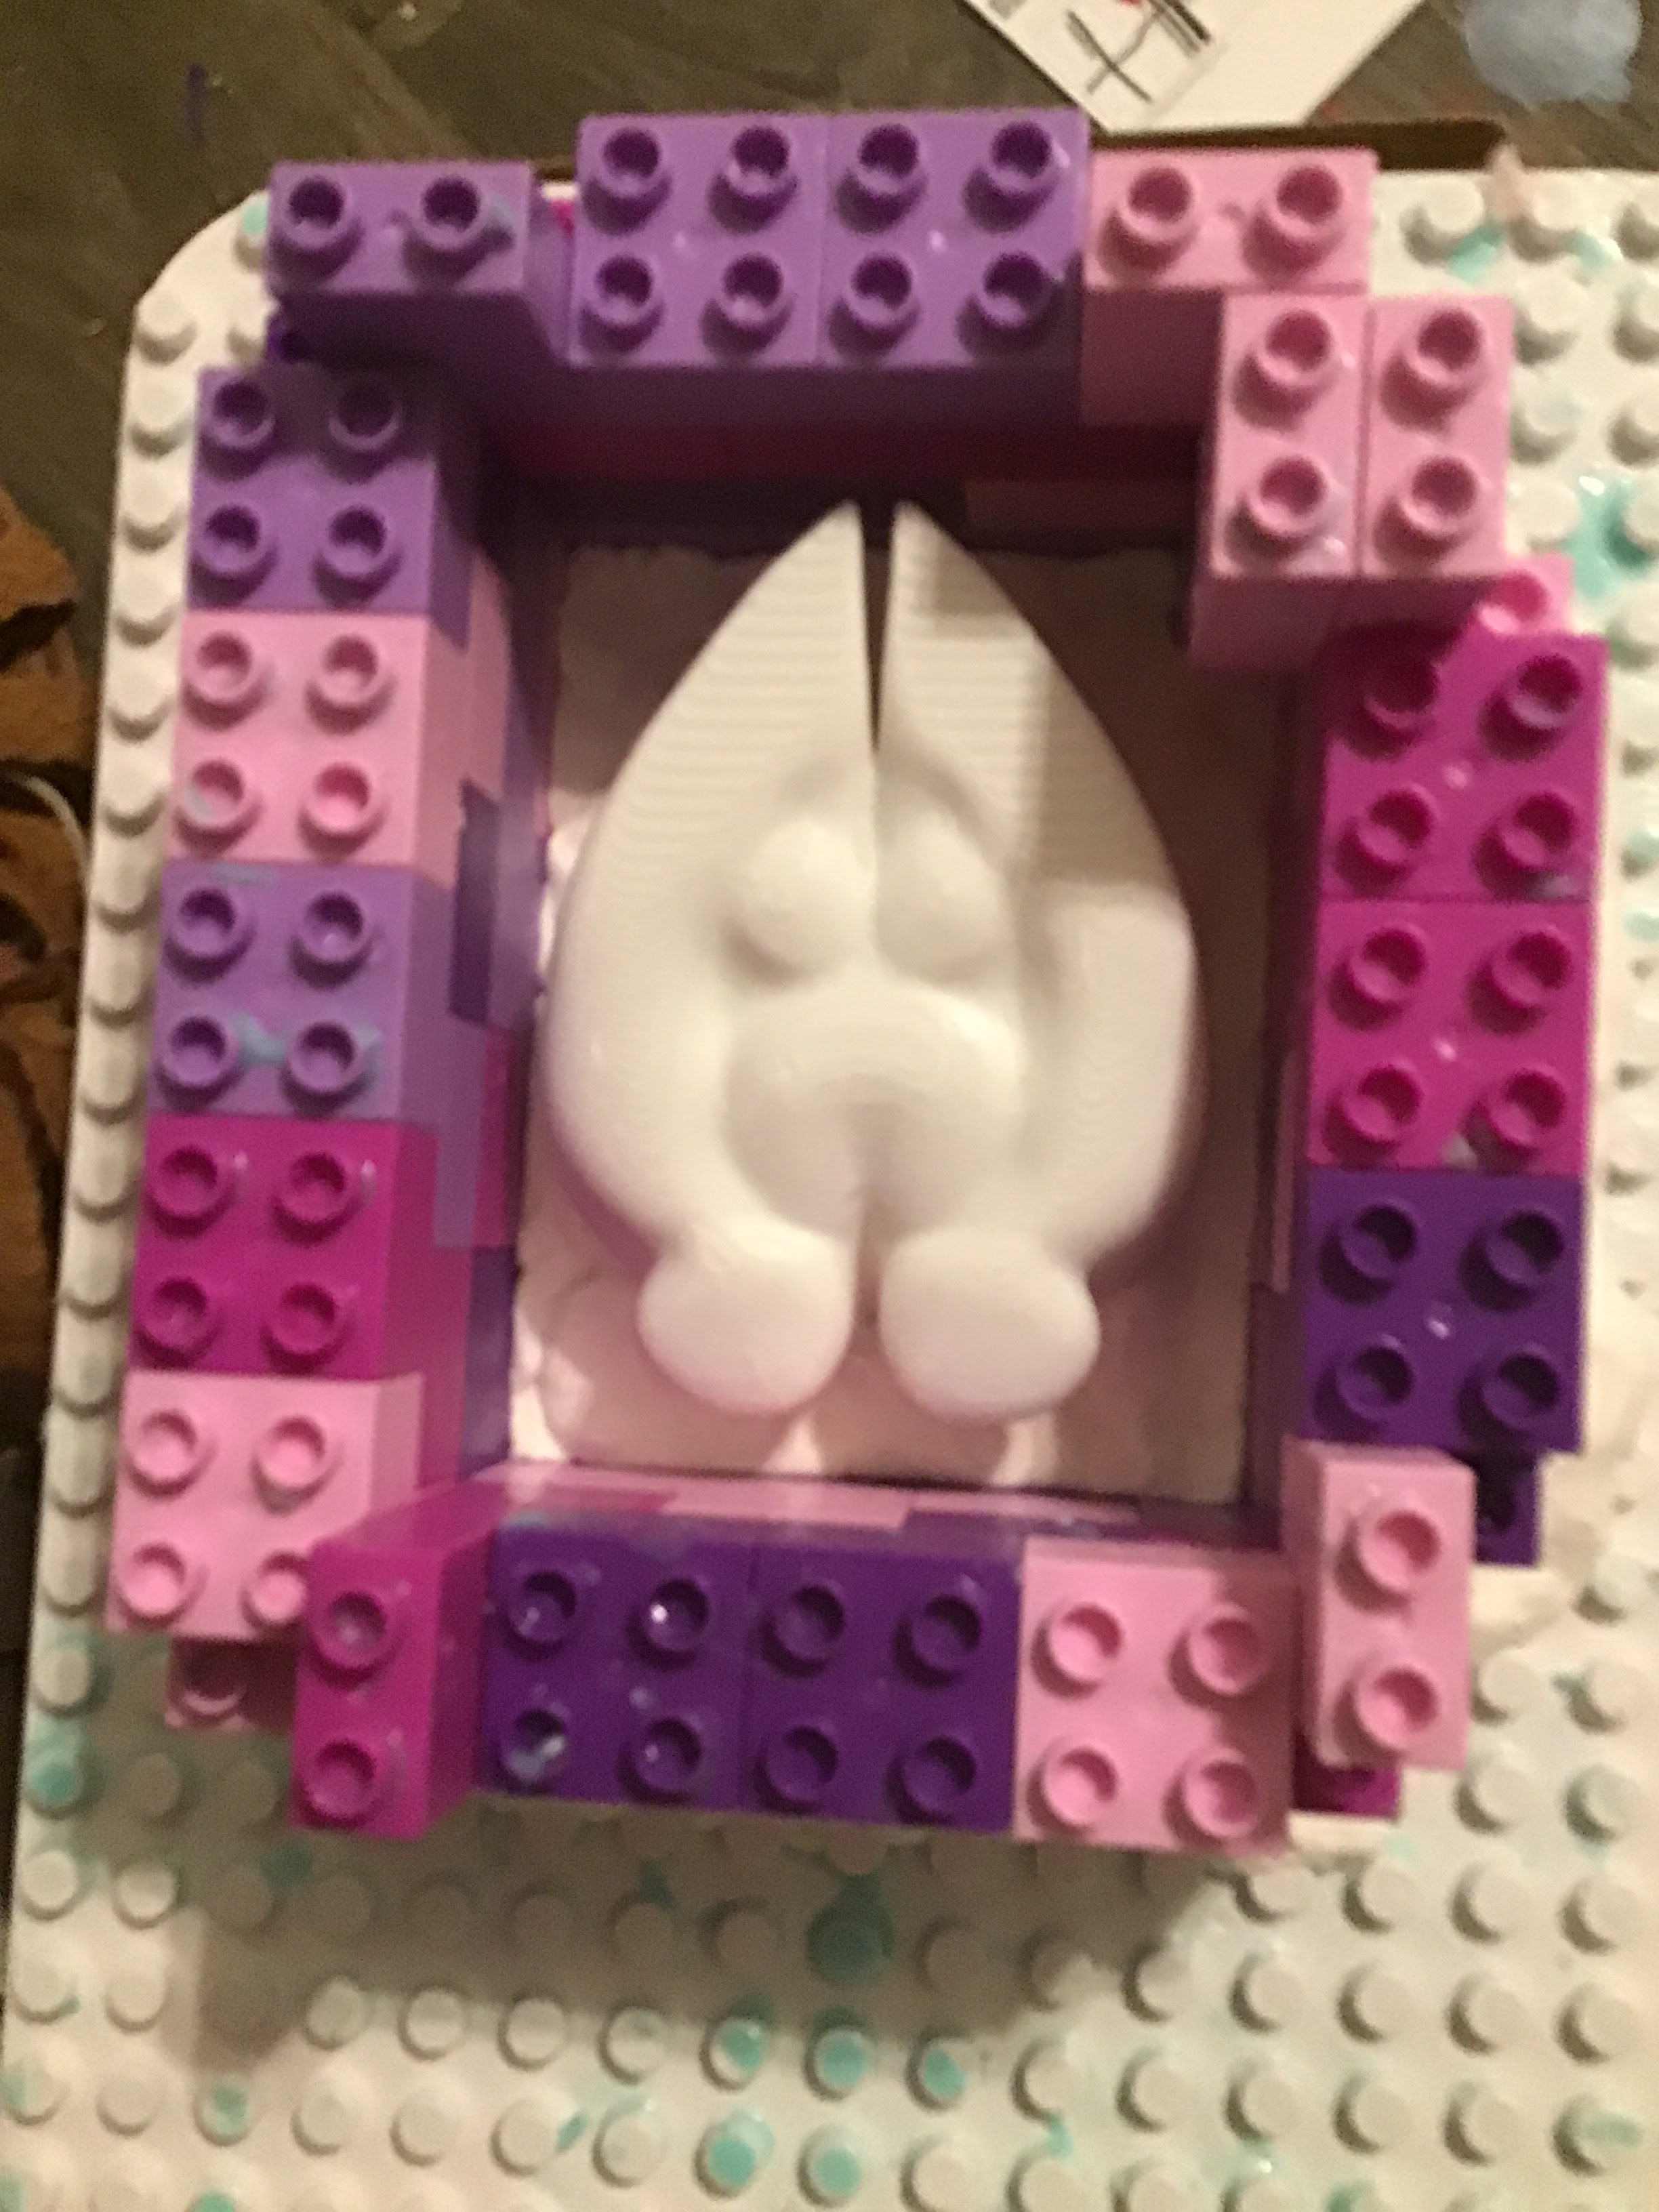
Over the weekend, I tried my hand at making a silicone mold using Smooth-on Mold Star 15. I built a lego box for my model and realized I didn't have a large container to mix with. So I hoped that working in shifts would be okay. I used up all of part A and B but it wasn't filling the box. Probably because things weren't staying in the box. I had not noticed that everything was leaking out. So, that was a wash! I put things in the sink and tried to figure out how to clean up the mess.
Pro-Tip: I should have waited 4 hours for things to set and enjoyed the therapy of peeling rubber off. No need to rinse things off. That just made things gooey.
Anyway, I had forgotten a step in the lego box construction to seal up the sides with sulfur-free clay. (I used modeling foam but it's sulfur-free too.)
 |
| Rebuilt the box |
I'm waiting for my replacement silicone mold mix. I found a slightly cheaper brand of mix since to be fair, I'm learning. And when learning, sometimes using materials that are cheaper to replace is better. Mold Star was 48 - 54 USD last I checked so, that turned out to be kind of a waste, sadly.
UPDATE 6/28: So I have a 2nd failure with making a silicone mold. The foam was not strong enough to hold the plastic piece down while the mold was solidifying. The plastic was so lightweight it floated. 😭😭 I'm going to continue to let it form just because I want the practice of making a mold, but I just purchased boots from the Etsy Seller because I don't want to spend any more money on silicone. The mold mix was good and mixed well and I managed to get it not to leak!
However, I think the little Lego bricks are a little tighter than the bigger blocks that I got.

Comments
Post a Comment