Die cutter and plotter machines use vector coordinates to plot movement of the blade/pen. That being the case, it works best with simple images, not so much with multi-colored images or images with thin lines. Vector or "stencil style" images and shapes work best for this machine.
For the aprons I had a combination of simple shapes, a stencil, and a mildly complicated solid shape. These images included:
- 3 circles for gold buttons
- 2 silver bars
- Kanji symbol in silver
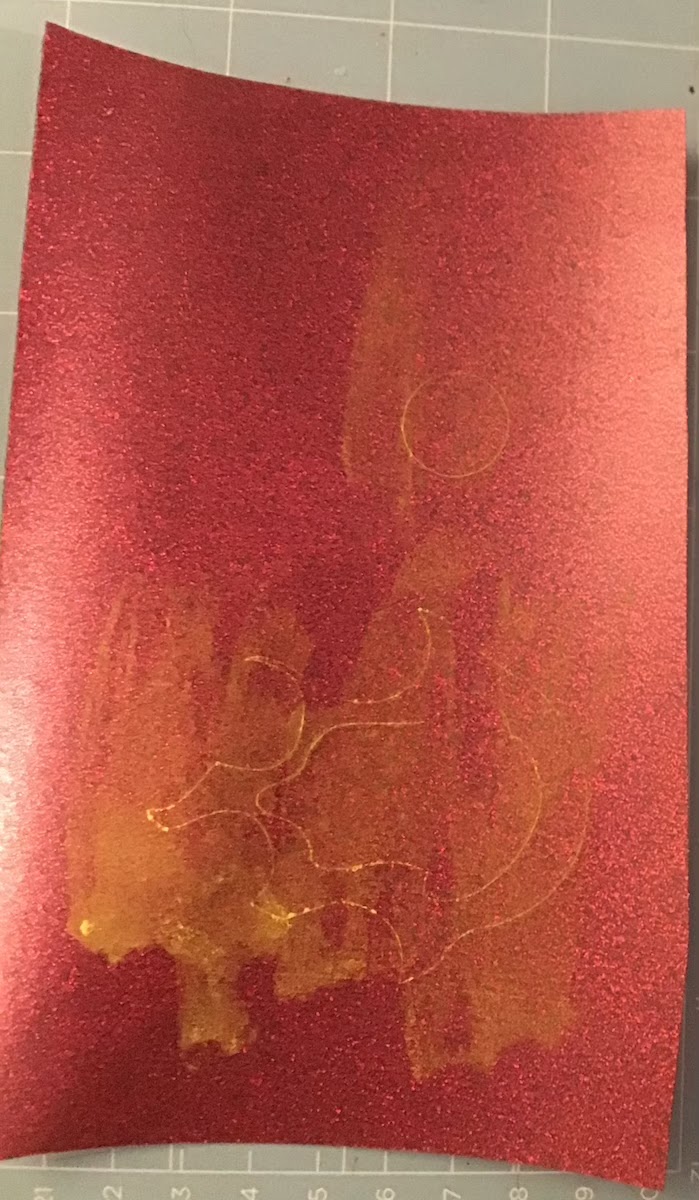
- Flame Hilt in gold and red
- Stencil Kyojuro in black
Dimensions
For this project, dimensions of the image were extremely important. The pieces that would have iron-ons included the heart shaped pocket and the heart shaped bib. Using the paper pattern I blocked out where the image would sit.
 |
| The pocket had a 3 x 3 inch block. |
Simple Shapes
Most die cutter machines come with their own software which converts images to plot points and cut lines. Most of these include simple shapes like circles and rectangles. So for the uniform design, I used the software default circles and aligned them so they centered vertically. I fiddled with the spacing between the buttons and size of the buttons so I settled on the buttons being 1.5 inches in diameter. The rectangles were also made to be 3.5 inches long and about .5 inches tall.
SVG Files
The Kanji and Kyojuro images were images that I converted to a Scalable Vector Graphic (SVG). This is the standard file type for most die cutting software. Originally, the Kyojuro Stencil was an STL file. Meaning, it was 3D model for 3D printing actually. I used TinkerCad to convert it to an SVG. I did a little bit of editing in Inkscape.

The Kanji was originally a JPG image. I used the site pngtosvg.com and uploaded it there. I made sure the color palette was 1 color.
I have a more detailed post on prepping images for die cutting on my Modesty Studio blog.
PNG/JPG Images
Now, most die cutting software can handle other file types besides SVG. There may be just a few extra steps involved as the conversion happens within the program. I work faster currently using pixel based imaging software such as Clip Studio and Photoshop. (I have inkscape but prefer Photoshop. I have the shortcuts committed to muscle memory!) So for the Flame Hilt I traced this photo into vector style images in photoshop.

Since this was going to be a multi-colored iron-on, I split things into 3 layers and saved each layer as its own image. When I imported the images into my die cutter software, I aligned the pieces where I wanted. Since the iron on would be gold and red, I created a file with just the red part separately.


Note: For the flame pieces, I created an "alignment" shape to one side so I could match them up after cutting and weeding.
Arranging, Cutting, and Weeding
Once I imported my images or created them on the canvas within the die cutting software, I made sure that the dimensions of the images matched the dimensions of my pattern pieces. I also arranged things on the canvas based on the color it would be.
For iron-on cutting, it is very important to MIRROR THE IMAGE before cutting. (That is if the image is asymmetrical or includes Text. Really doesn't make much difference to mirror a circle).
Many instructions for loading the iron-on HTV material into the machine can be confusing, especially if using a metallic, glitter, or somehow other reflective material. This is because they say to put the "Shiny" side up. 😕 I think it is better to illustrate:
 |
| This is NOT the shiny side...surprisingly. |
 |
| This is considered the shiny side. |
Basically, the most reflective side should be stuck to the loading mat. (Or rather the side that will be facing the world should be face down on the mat.)
I went through the process of running the cutting machine and got all my pieces cut. When the cutting was done, it was time to remove the "negative" space of the image to reveal the image to iron down. This process is known as "weeding".
The challenge with glitter vinyl, is you can not see the cut lines clearly. There are several solutions:
- Attach a pen to your cutting machine and have it draw then cut.
- Use baby powder, chalk, or other powdery substance to dust the cracks.
- Use a lightbox
 |
| I dusted with chalk |
After the tedious process, I have my iron-on pieces ready to go. I'll go over the ironing process next time.
 |
| Delicious weeds |
Comments
Post a Comment