Heat Transfer Vinyl (HTV) needs heat to get the glue to fuse with fabric. Loads of official tutorials show how to transfer HTV to fabric using official heat presses. Needless to say, yes, heat presses are ideal for this process. However, this is a budget blog so lets look at best tools.
Tools
Last blog, I kept referring to HTV as Iron-on...and that is because I'm using my normal, everyday iron. There are pros and cons to using a household iron for this process:
- 👍Convenient if you already have one on hand
- 👍Irons come in many sizes
- 👎It has limited surface area
- 👎The hot surface is irregularly shaped
- 👎HTV does not work with a steam iron
- 👎The iron needs to be very hot!
- 👎Cannot be used easily on round/cylinder shaped objects
Using an iron is possible but may not be the best tool in the following cases:
- Applying a very large iron on piece
- Producing a large quantity of products with HTV
- You plan on selling what you make.
- You are applying HTV to a curved object...like a mug, baseball cap, or shoes
- Your using "infusible ink" and the iron has steam holes. It won't be a flat look.
The benefit of a heat press is that it distributes heat and pressure evenly across a large surface area. Many of the die cutting machine manufacturers also make their own crafter friendly heat presses that are sort of half-way between an iron and a commercial heat press. There are also specialized heater for mugs, caps, shoes, and other weird shapes.
In my process I used my iron. I had to make sure that the auto-steam setting was turned off and the temperature was set to as high as it would go.
Other Materials
Whether using a household iron or a crafter's heat press, the following supplies are recommended:
- A heat pad/folded towel - protect your work surface and absorb heat
- pressing clothe/teflon sheet - to protect the fabric below from burning. These are HIGH temperatures
- Sturdy table...or the floor. - You will be applying pressure.
- Heat resistant tape - to hold down larger designs so they don't wiggle
My Process
My materials included a Cricut heat pad, my household iron, and scrap cotton. I familiarized myself with the process outlined on Cricut's Help Center.
First I got my pattern piece cut from the poly cotton broadcloth.
.jpg)
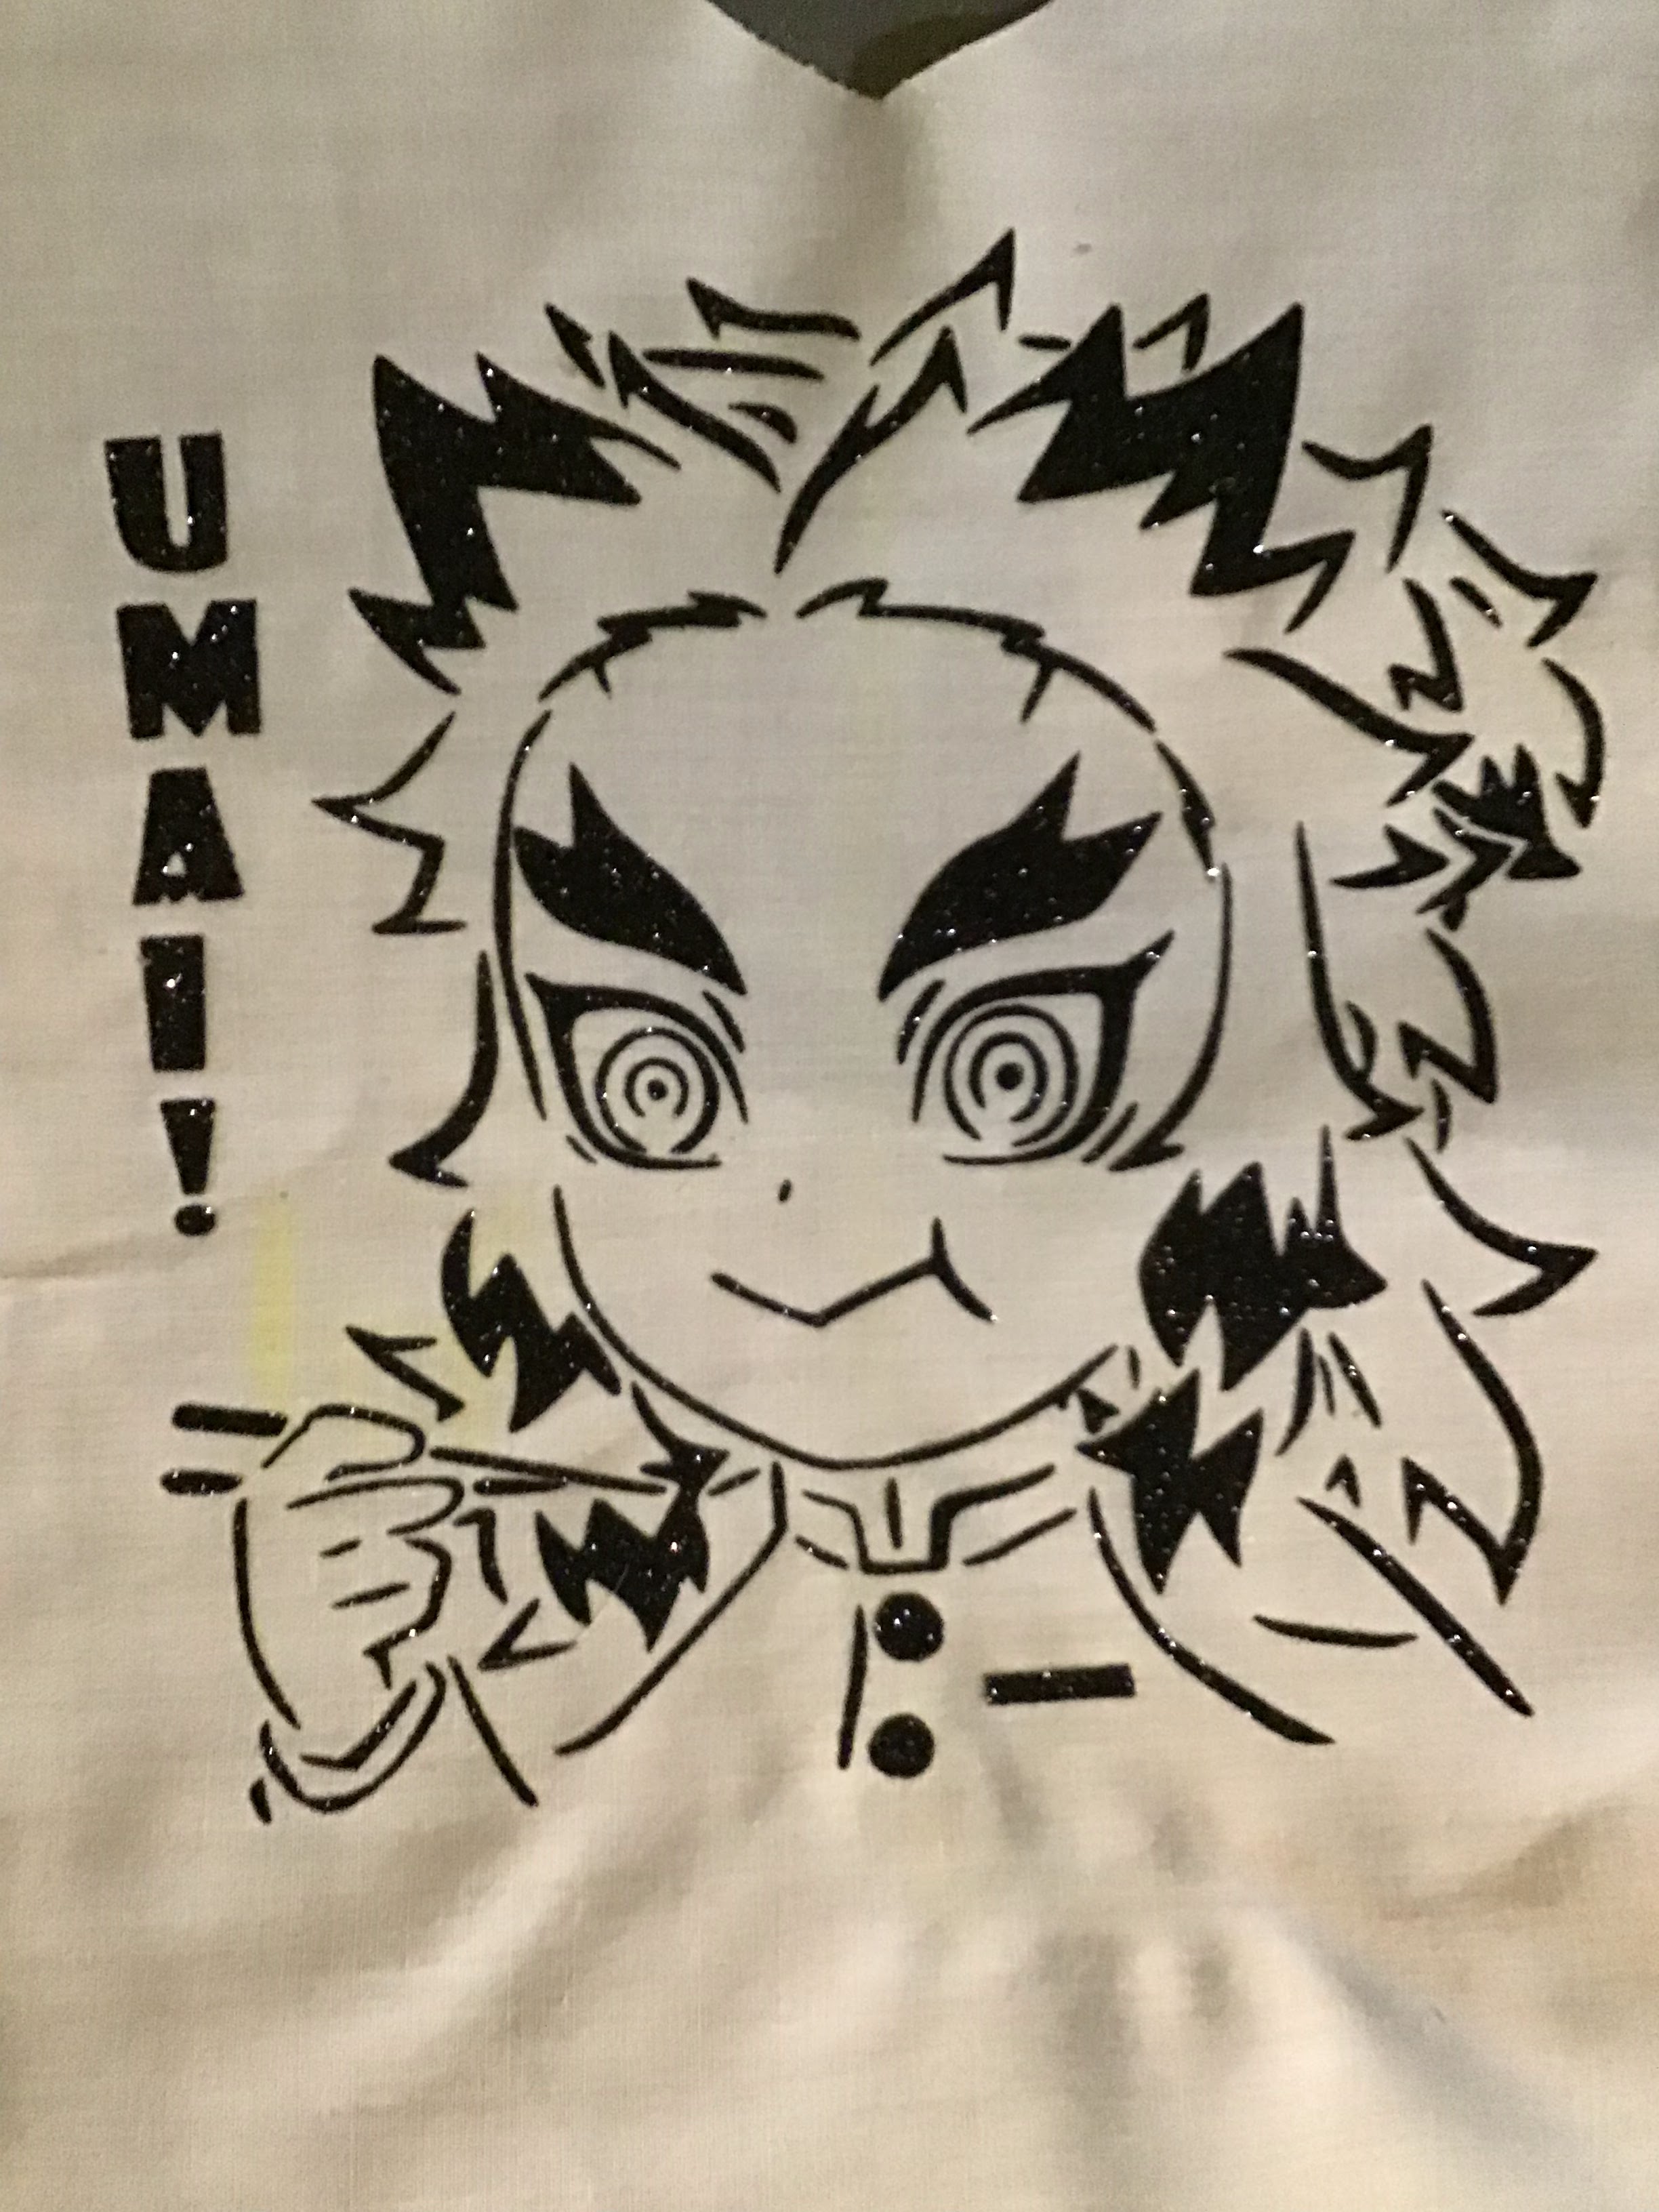
Then I placed my design sticky side down against the pattern piece. I pressed it down a bit with my hands to make sure the tape was gripping the fabric a bit. Then I covered the piece with my press cloth and pressed down with my iron over the design for about 30 seconds. I would say I used medium pressure.
✏Note: Each design required a different pressing technique so to speak. The buttons, bars, and kanji were small enough for me to simply press down in one spot. However, the flame hilt was two colors. So I had to iron each color individually and making sure that the pieces lined up. The stencil was larger than my iron so I had to press different regions for the allotted time.
After pressing over the tape side, I flipped over my pattern piece, recovered with the press cloth and pressed from the back for another 30 seconds. After I finished pressing, I waited for things to cool completely, then slowly removed the tape.
✏Note: While removing tape from the large stencil, I noticed a few pieces lifted away from the fabric. This is fine. I simply covered the area with the pressing cloth and used the tip of my iron to press for about 15 - 20 seconds. Then continues to lift it off.
 |
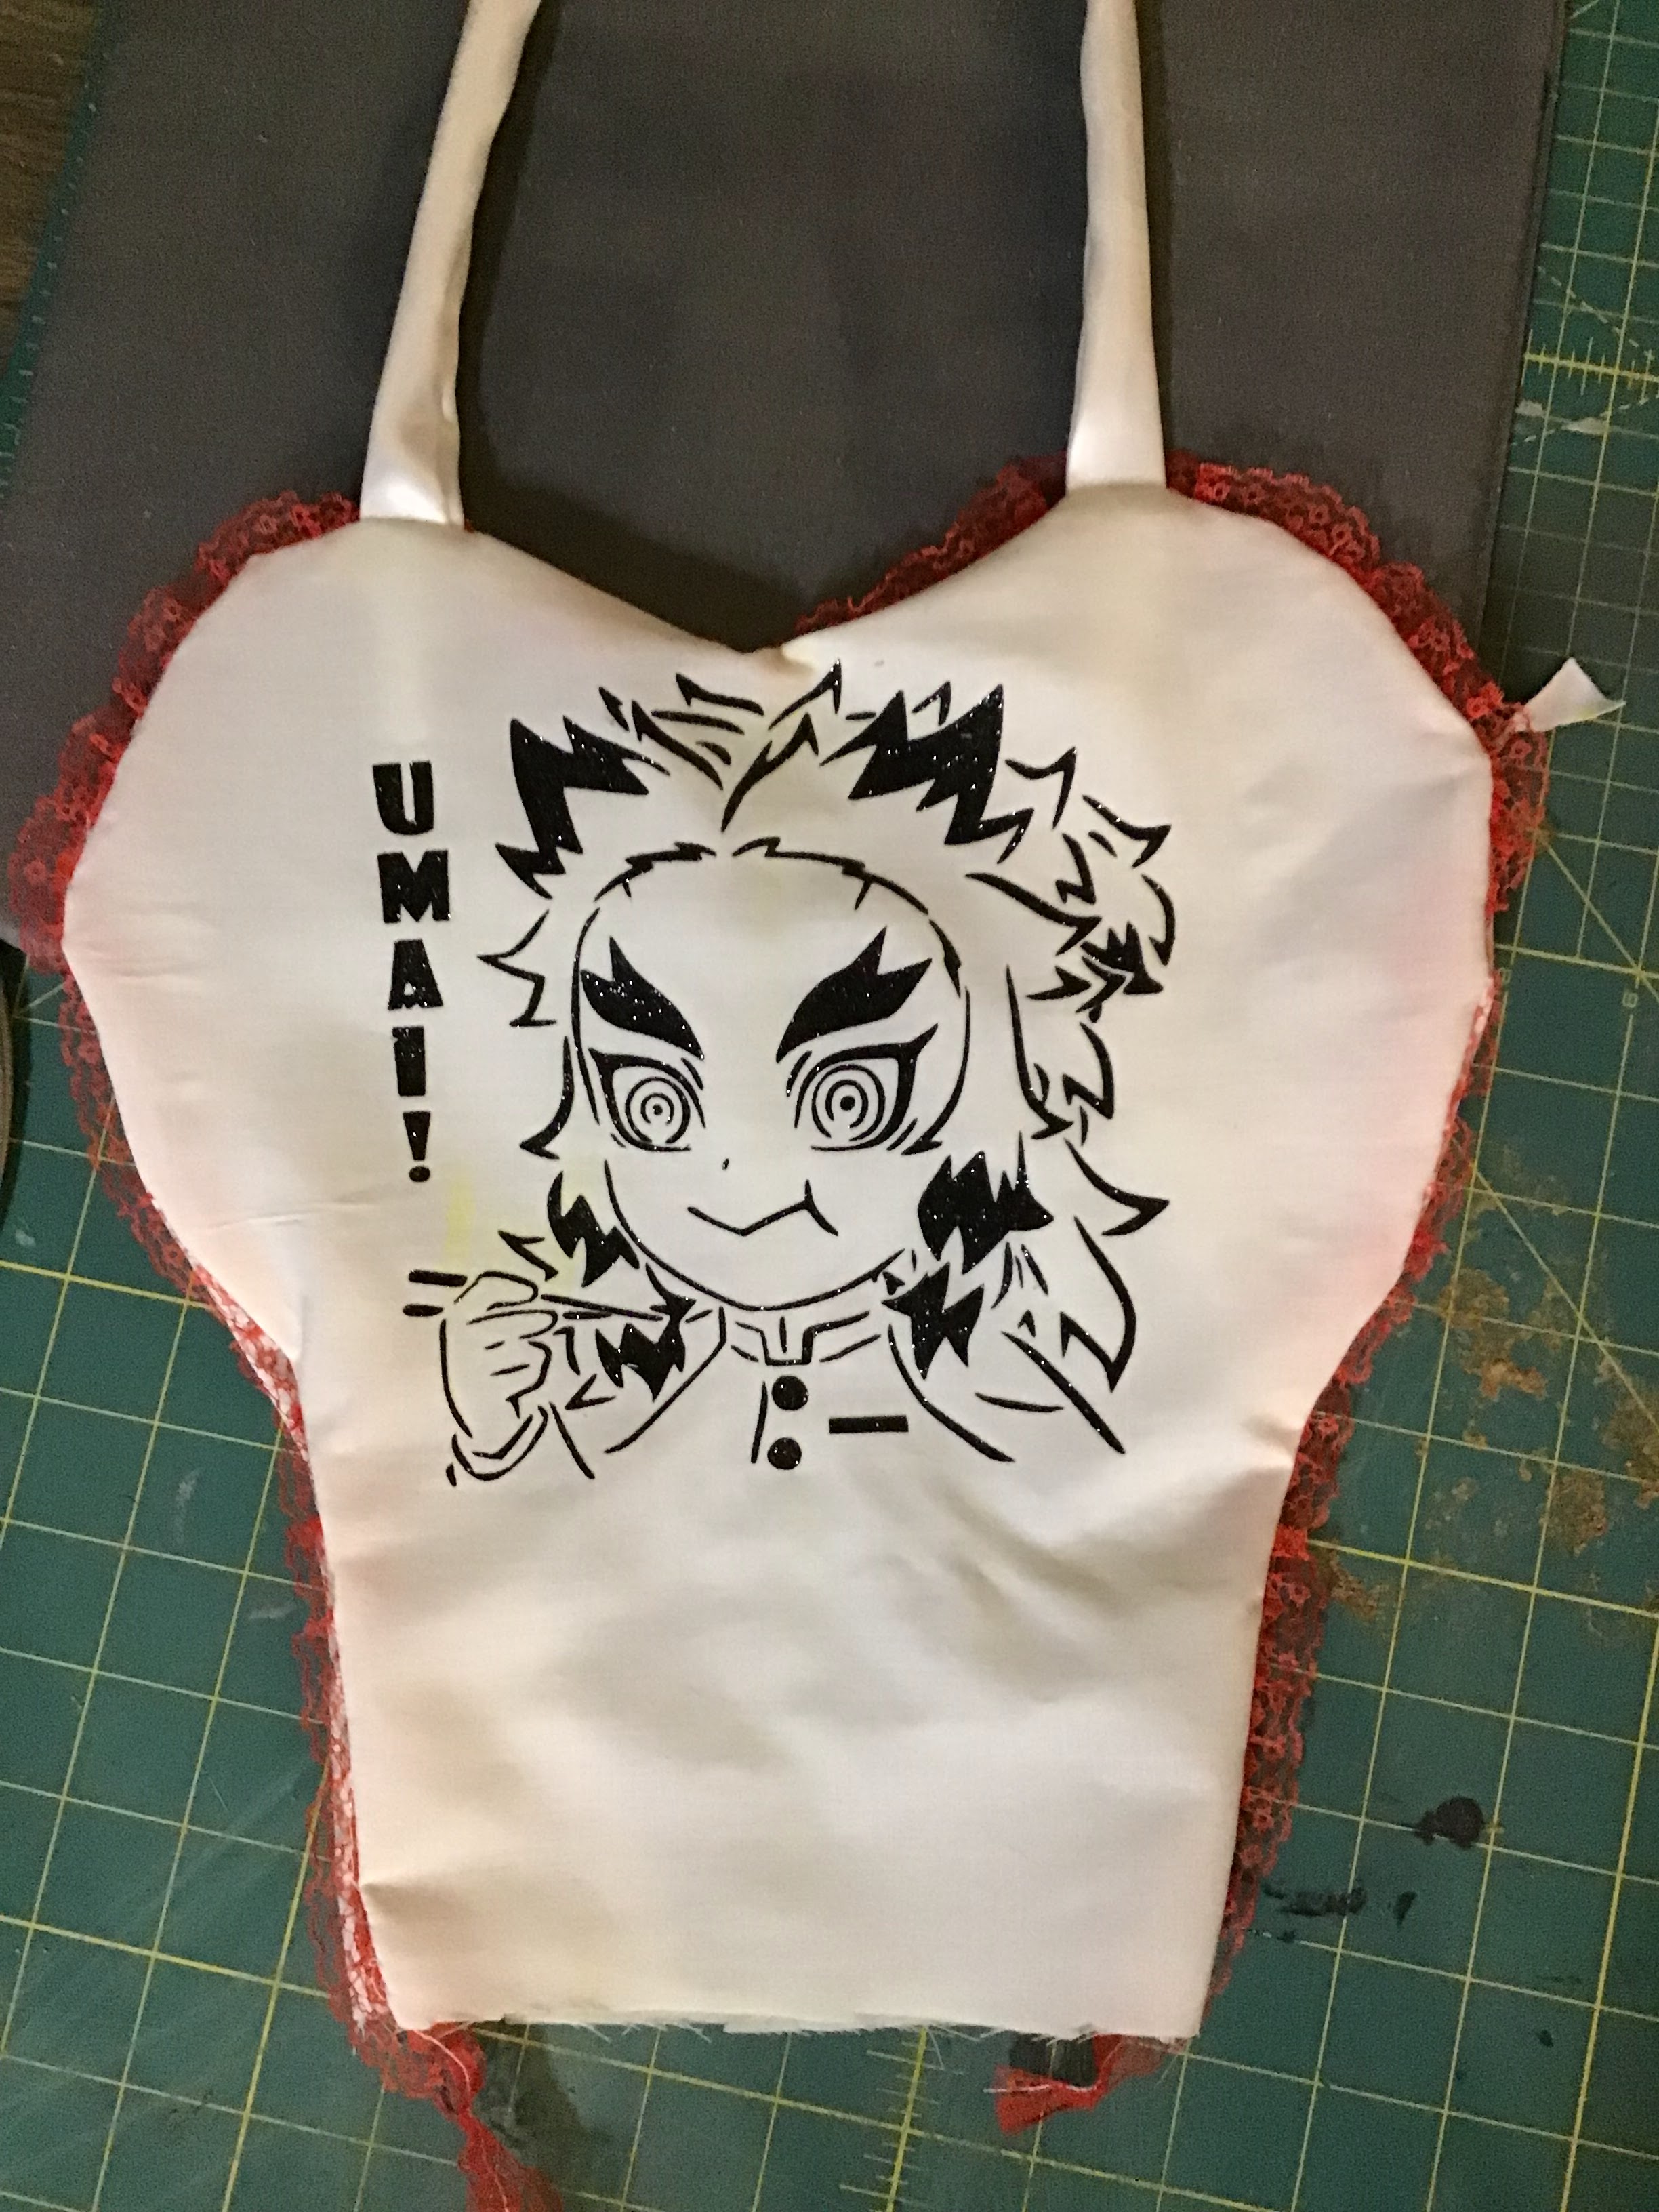
| Some of his hair pieces lifted but it is transferred! |
So that's how I did it. In hindsight, I think I could have moved the designs a bit lower on the bib pieces. I over estimated how thick the belt part of the apron would be. However, I literally talked myself through the process several times to make sure I had memorized the instructions. A kind of mental practice. As well as practical practice on scrap bits of fabric with scrap HTV. That helped me see what success would look like.
Special note: For the flame piece, I had cut a small circle piece to help me align the two colors. But I didn't want to iron-on the dot, so I had put a piece of painters tape over it. However, this was a mistake because the iron nearly fused the tape to the fabric too! A chalk mark would have been sufficient. I put the gold color down first. I went through the whole process of pressing front and back side, then cooling and removing the tape. Then I sort of eyeballed the red interior color and gently pressed where I thought it would look good. Then proceeded to press front and back again, cool, and remove the tape.
 |
| All the iron-on pieces |
And that's that for this post. Next time, I talk about sewing things together! Well, mostly about adding ruffled trim because sake's alive...it's tough.
 |
| Lovely red trim |
Comments
Post a Comment